
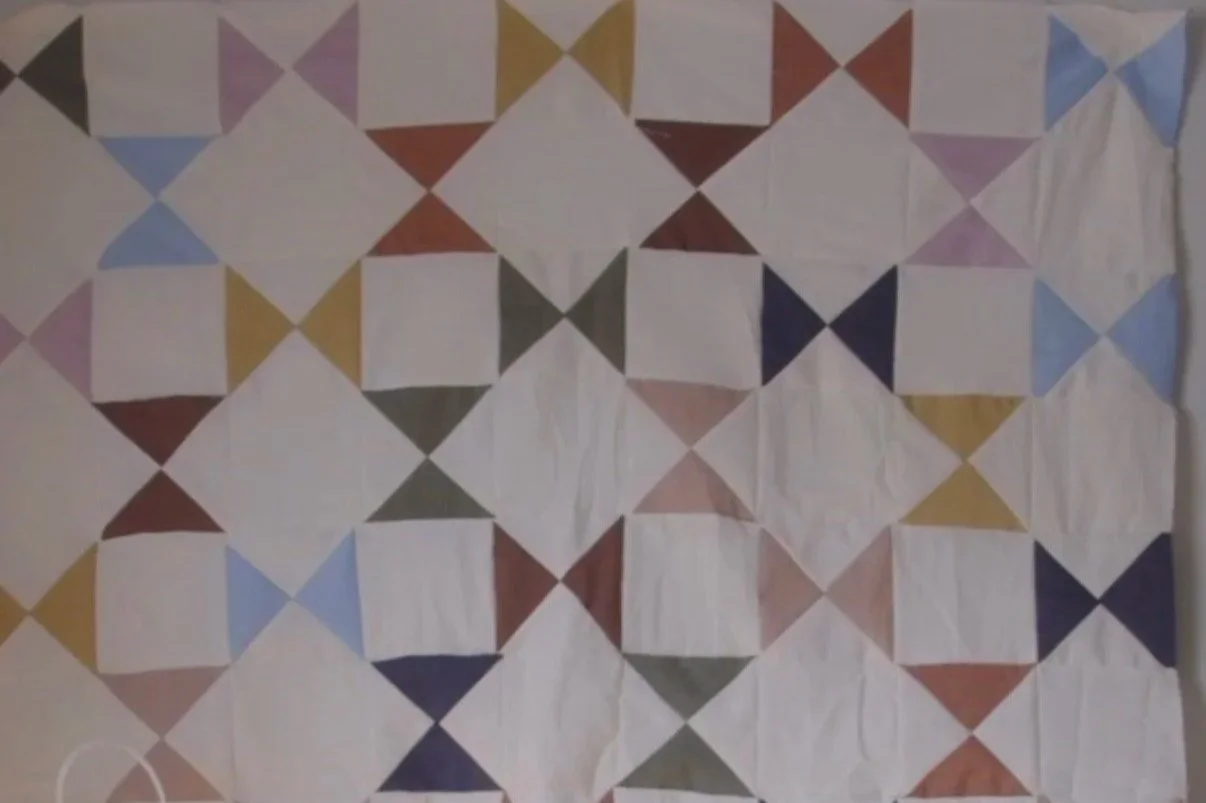
Recently I have been seeing these hourglass baby quilts everywhere and knew I had to try this out with some naturally dyed fabric I had been holding onto.
The cool thing about this quilt is that it is made up of one block so the construction is very quick. I was able to finish mine in about 3 hours ( with cutting included). Let’s make one together!
Step 1: Make your hourglass blocks
We’ll be making 32 hourglass blocks total. Feel free to mix and match your colors like I did! The process is the same for each block, and these come together quickly when you chain piece.
Pair your fabrics.
Start with one 6 1/4" square of each color, placing them right sides together.Mark your sewing line.
Using a fabric marker or Hera marker, draw a diagonal line from one corner to the opposite corner. This will be your guide when sewing.Sew on both sides of the line.
Sew a 1/4" seam on each side of the marked line.Cut along the marked line.
Using your rotary cutter and ruler, carefully cut directly along the line you marked.Press your seams.
You’ll now have two half-square triangle (HST) units. Take them to your iron and press the seams open.Pair your HSTs.
Layer your HSTs right sides together, with the opposite fabrics touching. Carefully line up the seams from the previous step, making sure the center point and seams match as closely as possible.Mark and sew.
Draw a diagonal line from corner to corner, crossing the existing seam. Sew a 1/4" seam on each side of the marked line.Cut along the marked line.
Using your rotary cutter and ruler, carefully cut directly along the line you marked.Press and trim.
You’ll now have two hourglass units. Press the seams open, then trim each block to 5 1/2" square if needed.
Step 2: Assemble your rows
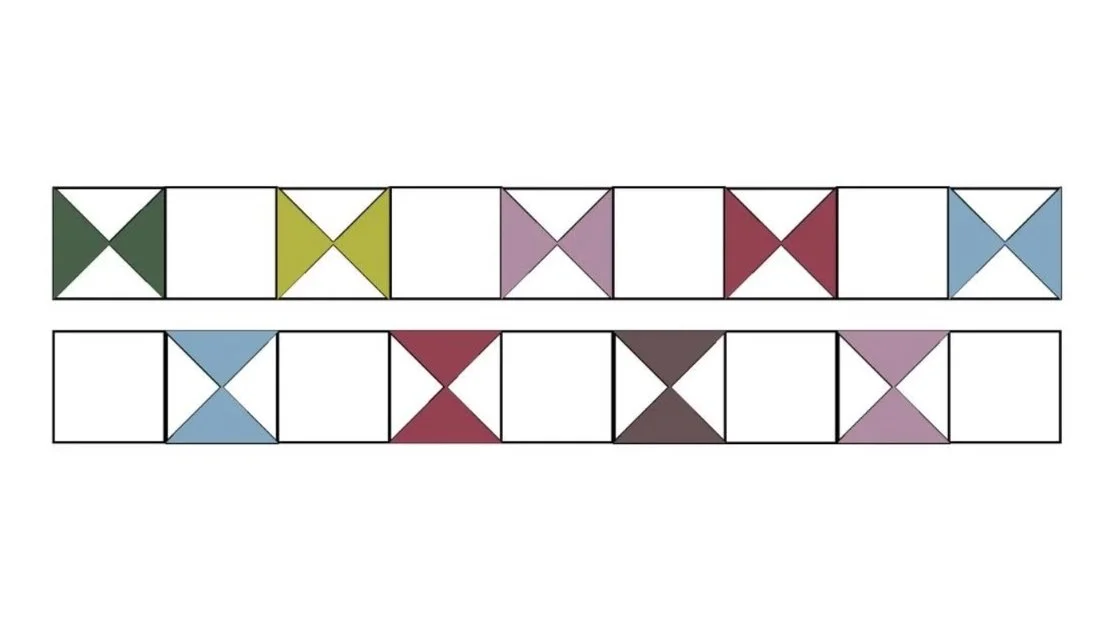
You’ll be making 7 rows of 9 blocks for a total of 63 blocks.
You will make 4 rows of the top illustration, and 3 rows of the bottom illustration.
Follow the illustration below to make sure each block is oriented correctly in each row. Take your time when laying out the blocks its fun to play with the color and placement within the quilt with this step.
Step 3: Assemble Your Quilt Top
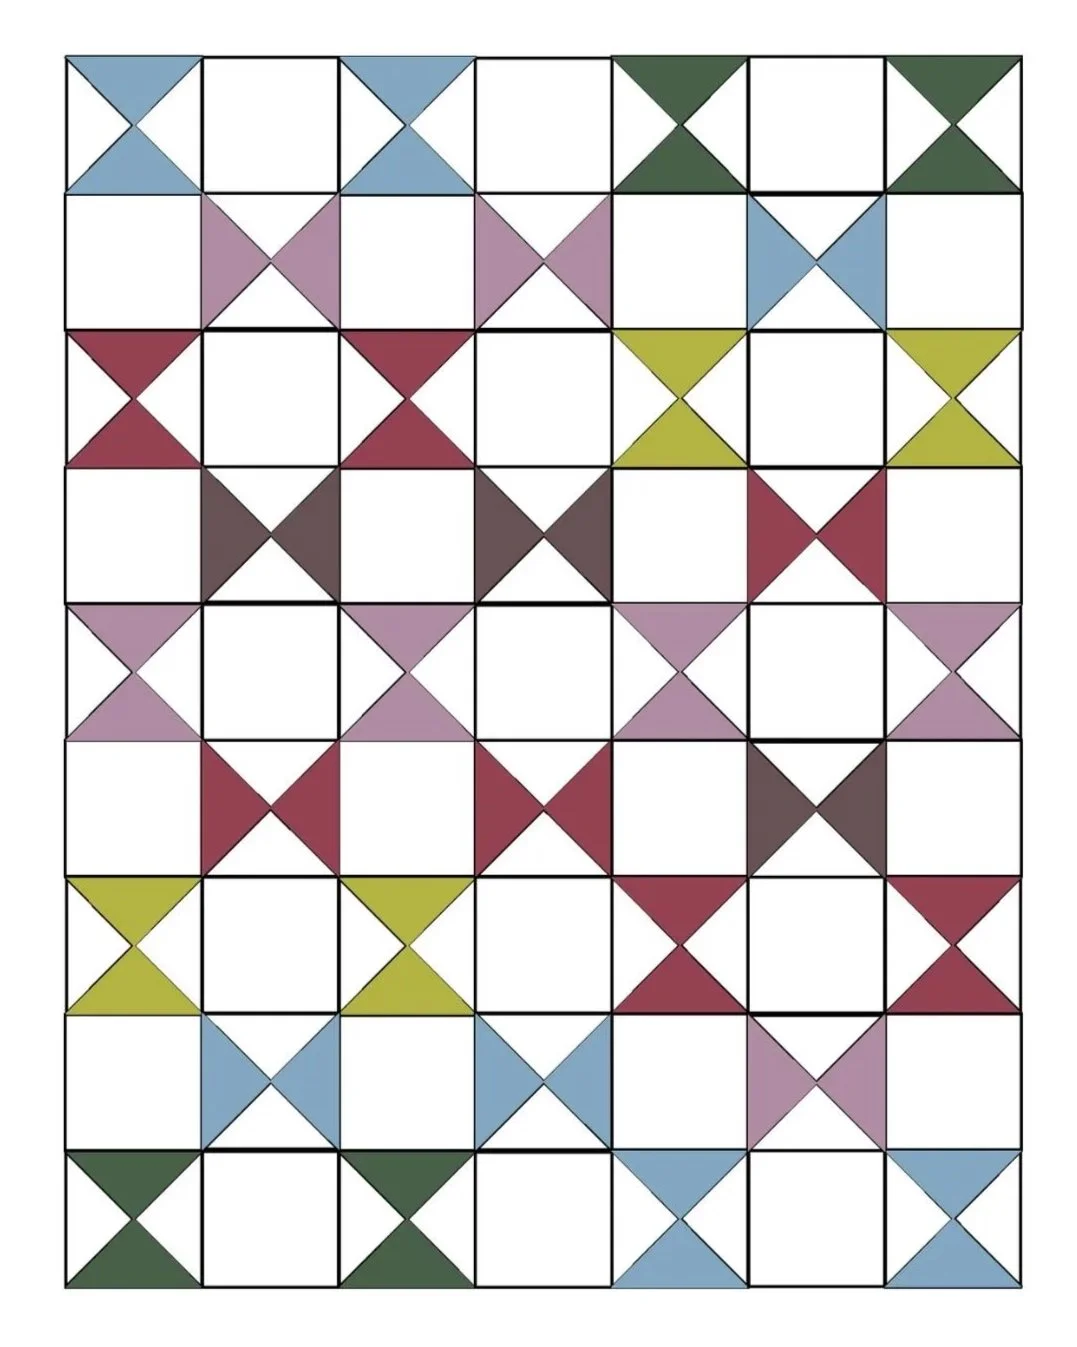
Once you’ve finished assembling your 7 rows, it’s time to piece your quilt top together!
I recommend laying all of your rows out on a table or floor first so you can see how your quilt top will look before you begin sewing.
Sew the rows together one at a time using a 1/4" seam allowance, making sure to keep the blocks oriented correctly as you go.
Once your quilt top is fully assembled, press your seams and admire your finished quilt top!
Products used:
Sunbird Organics Fabric ( shop on etsy!)
